How to Create an AI Chatbot for Free — No Coding Needed
You Can Create Your Own AI Chatbot for FREE
After my recent post on AI business ideas, many people asked: "How can we actually start building something with AI?"
Here is a simple place to start. You can build your own personalized AI chatbot completely free using Chatbase. No coding. No complex setup. Just a few simple steps — and your chatbot is ready in under 5 minutes.
Whether you want a chatbot for your website, a customer support assistant, an AI FAQ bot for your business, a knowledge assistant for your team, or even a prototype for your startup idea — this guide walks you through every step.
What You Can Build
| Use Case | Description |
|---|---|
| Website Chatbot | Answer visitor questions automatically |
| Customer Support | Handle FAQs and common queries 24/7 |
| Knowledge Assistant | Help your team find internal information fast |
| Startup Prototype | Test your AI product idea before building |
| Personal Assistant | A chatbot trained on your own documents |
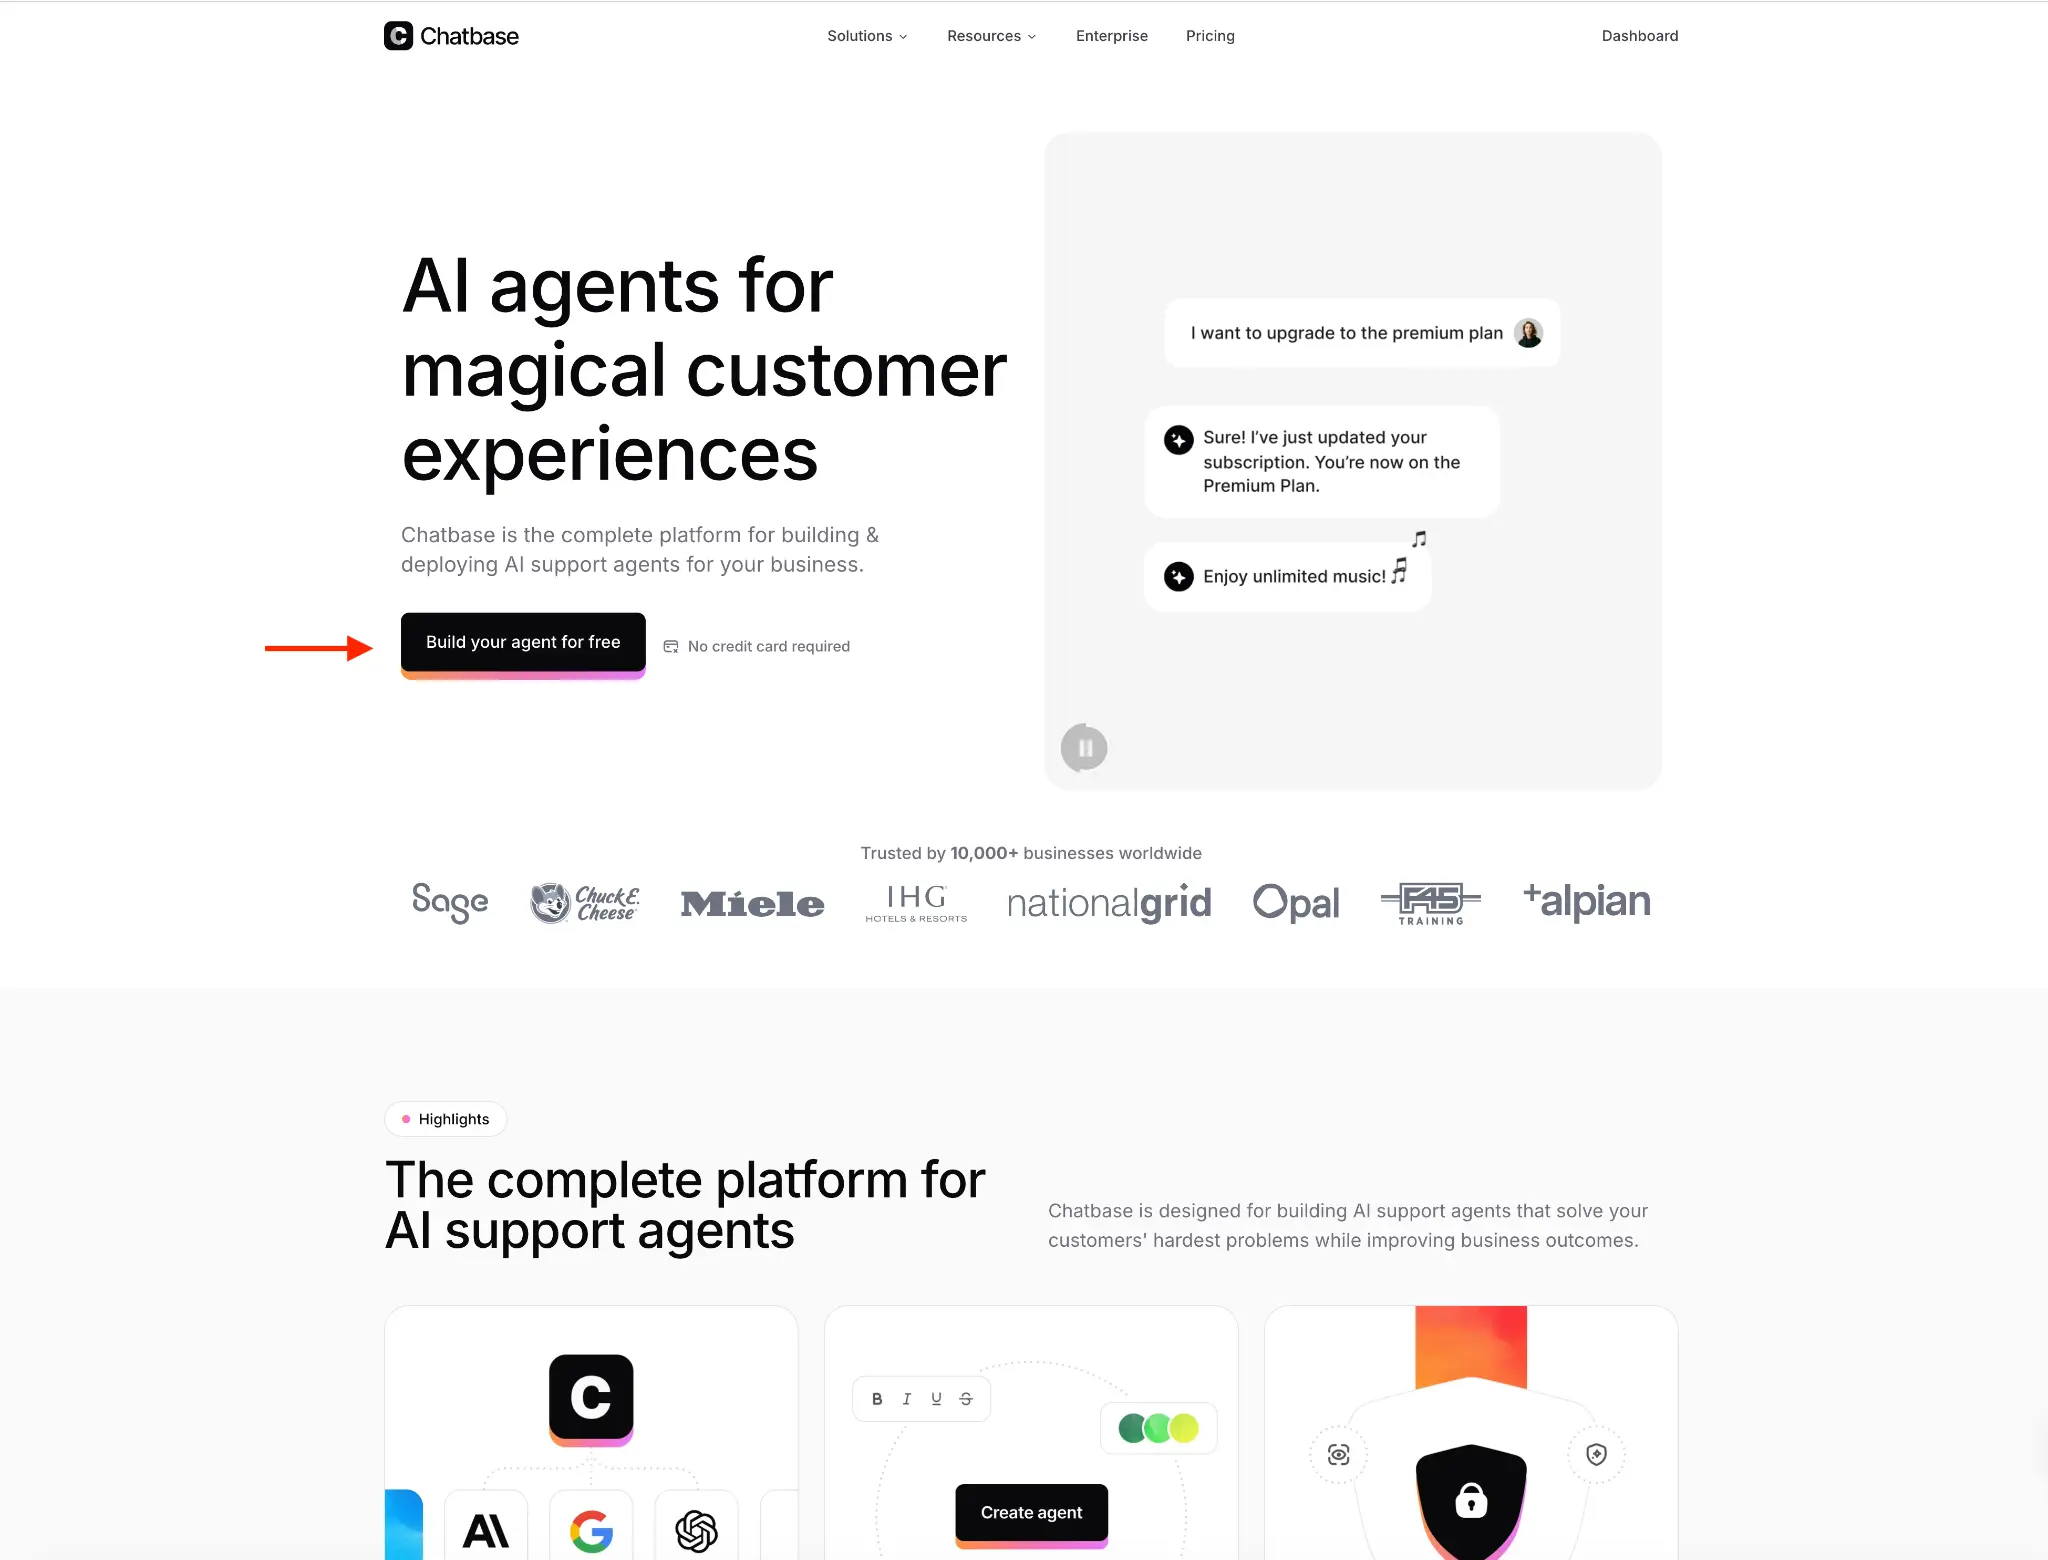
Step 1: Go to Chatbase and Sign Up
Head over to chatbase.co and create a free account. Once you are signed in, click on "Build your agent for free" to get started. No credit card required.
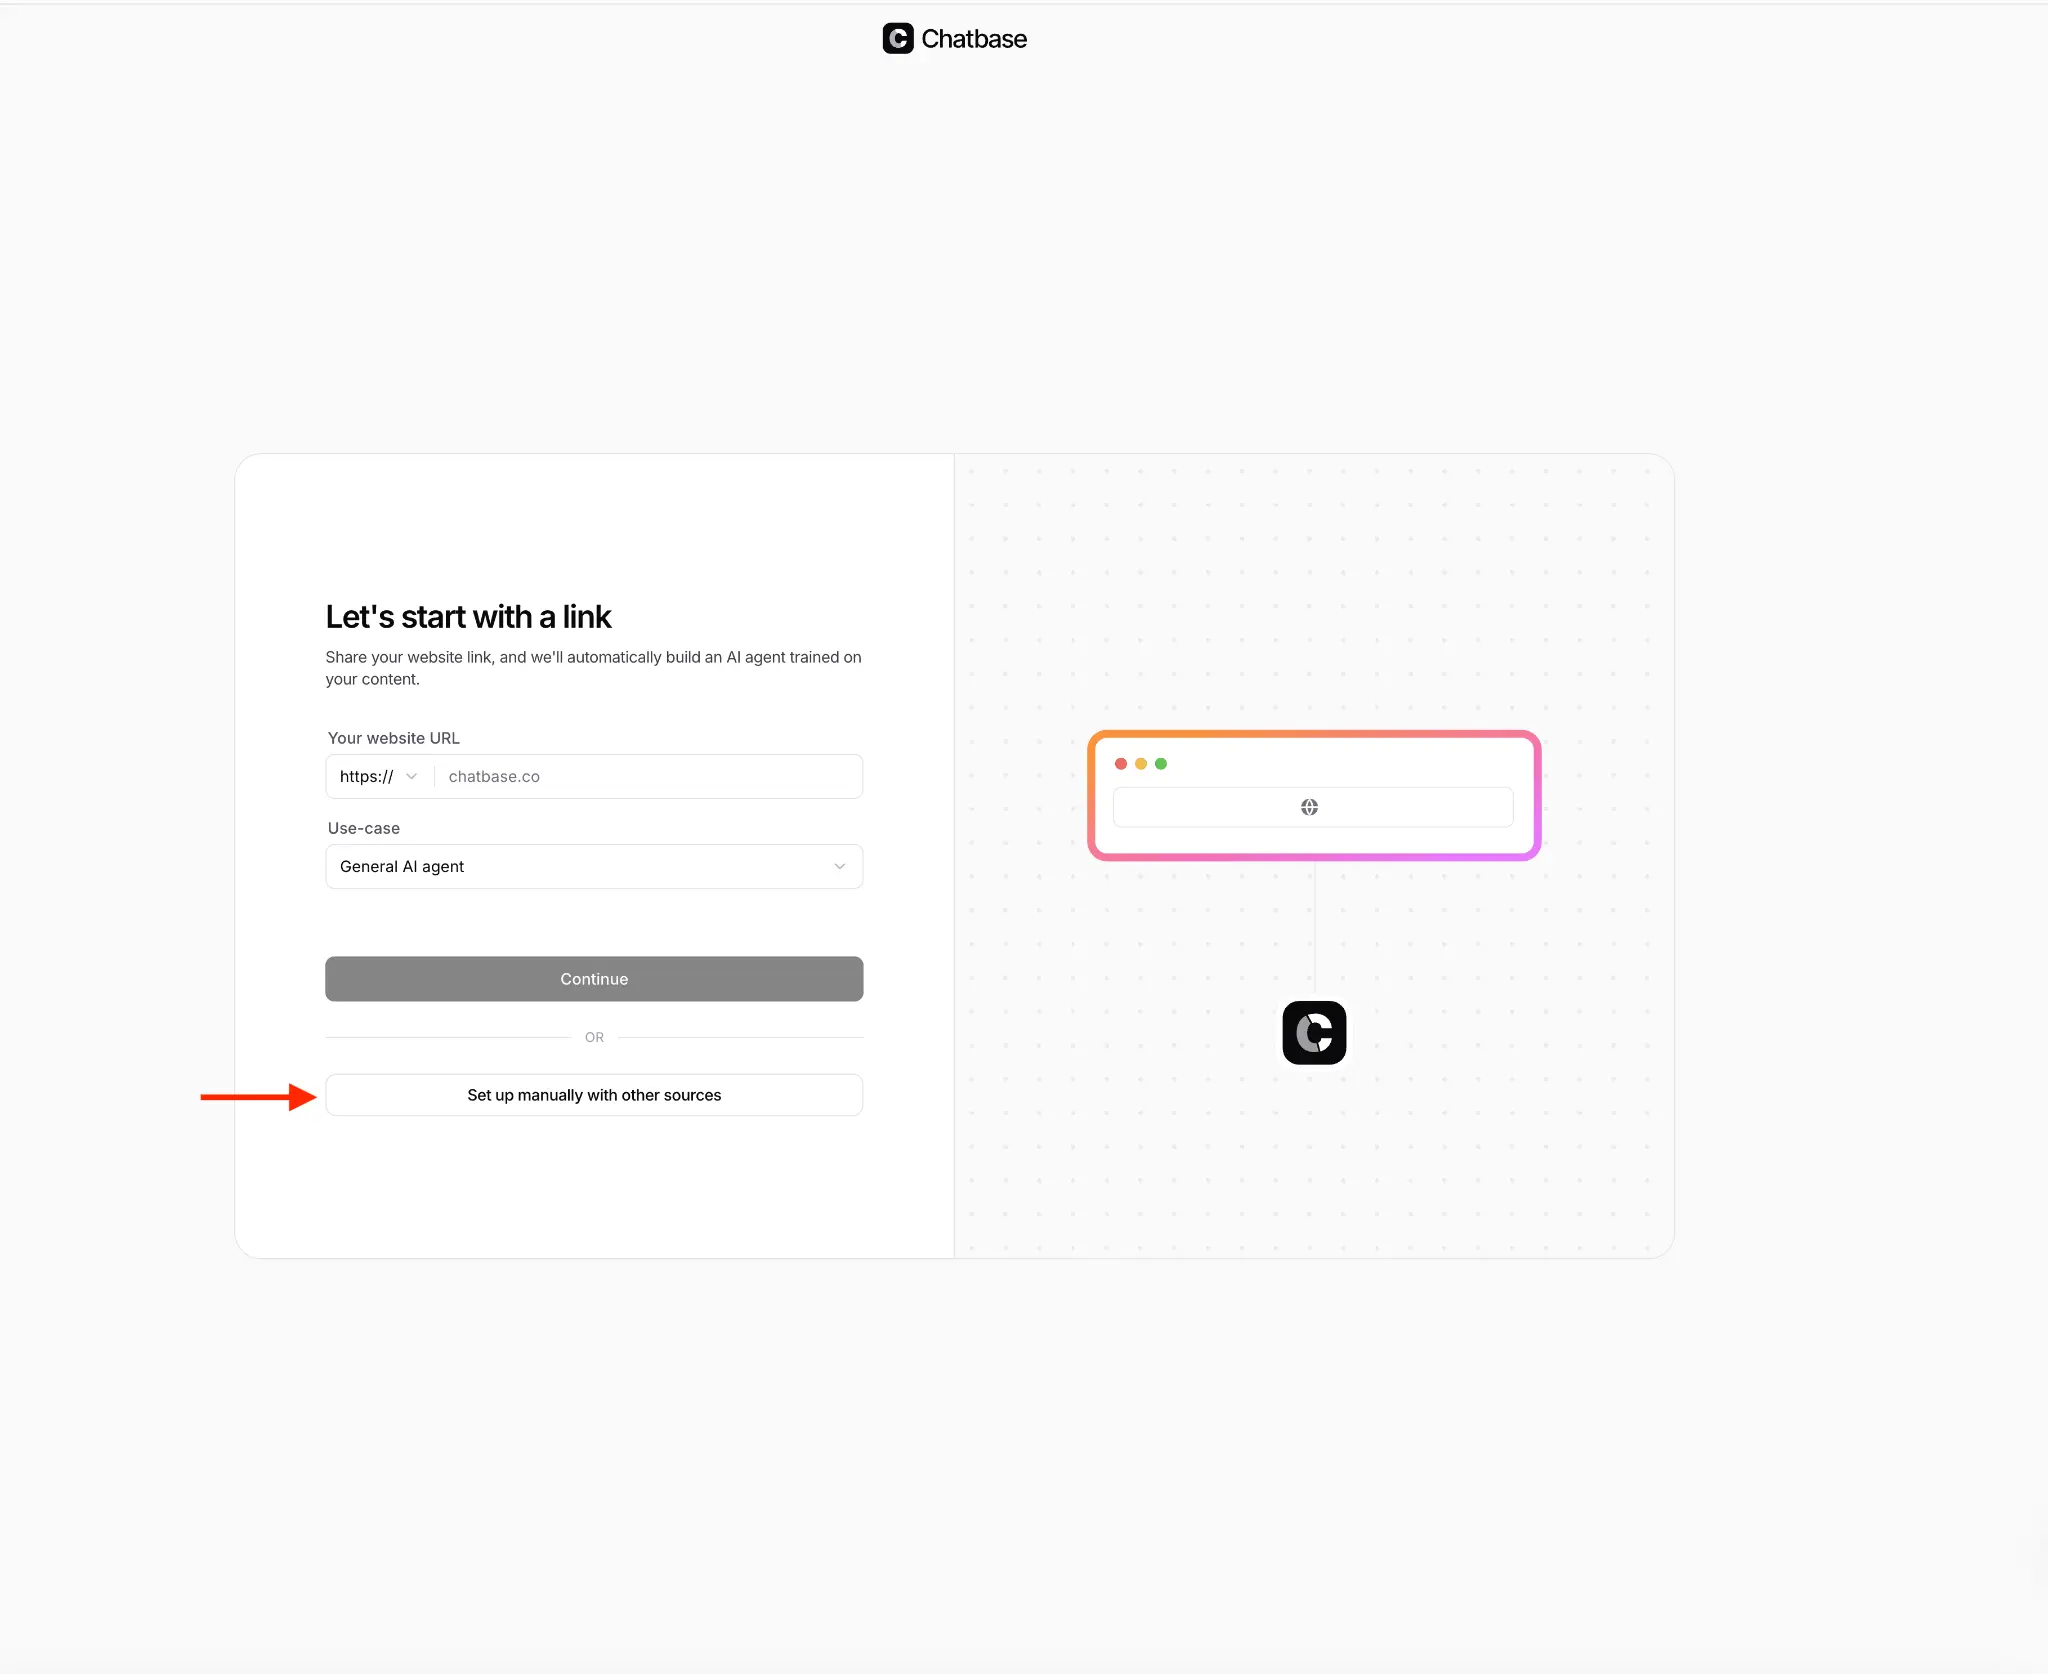
Step 2: Create Your AI Agent
You will see a setup window where you can either enter your website link (and Chatbase will automatically build an AI agent trained on your content) or choose "Set up manually with other sources" if you want to upload your own documents.
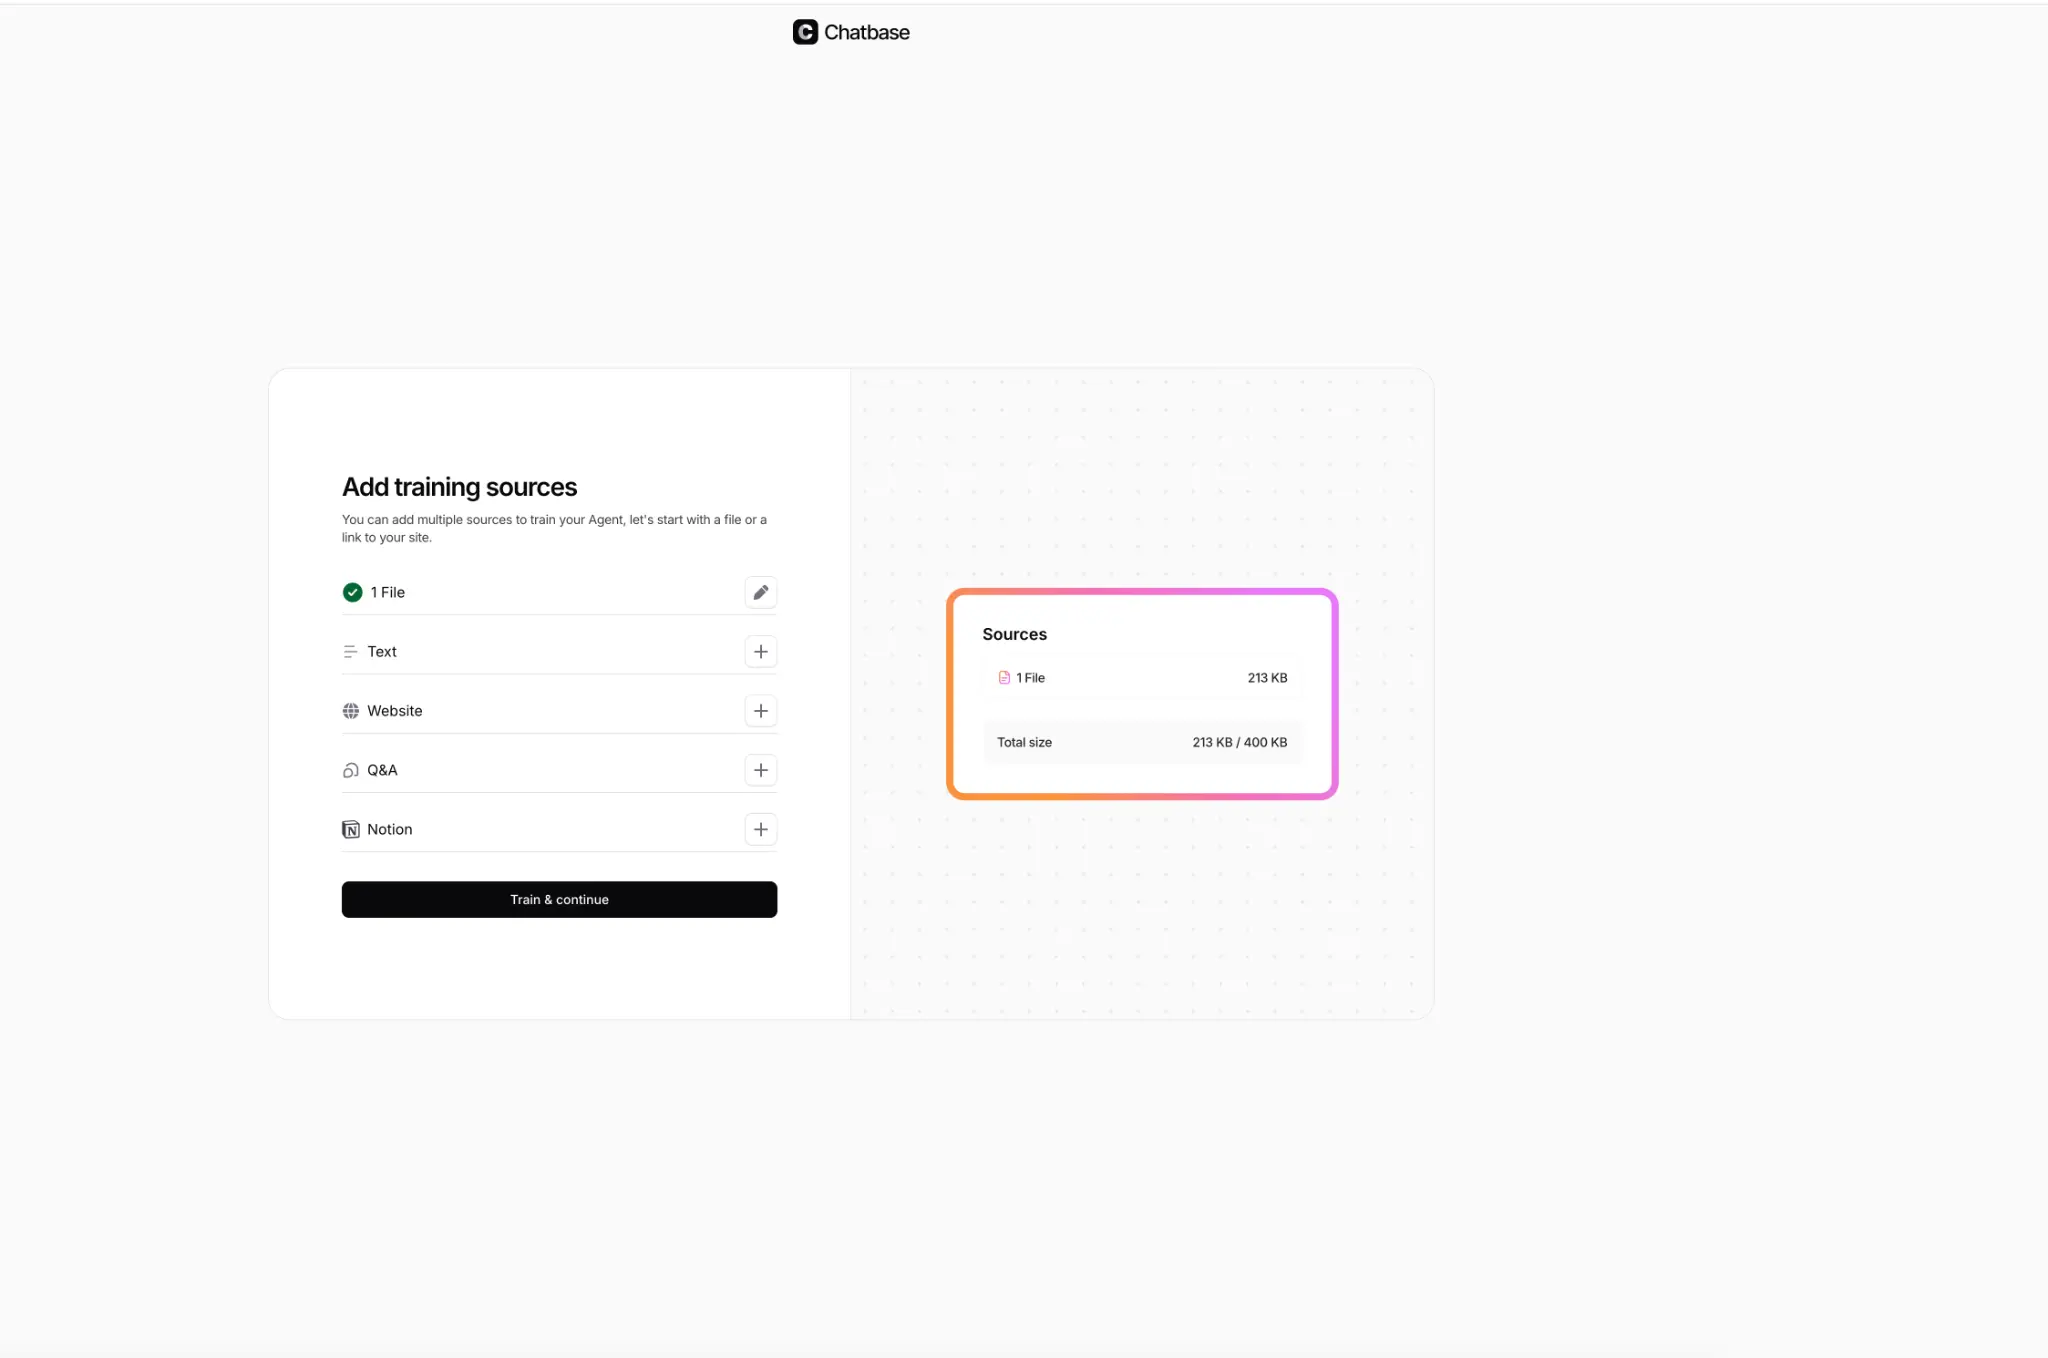
Step 3: Add Your Training Data
Now it is time to upload your knowledge base. You can add data from multiple sources — files (PDFs, docs), plain text, website URLs, Q&A pairs, or even Notion pages. The free plan allows up to 400 KB of knowledge, which is more than enough to experiment.

Step 4: Upload and Verify Your Data
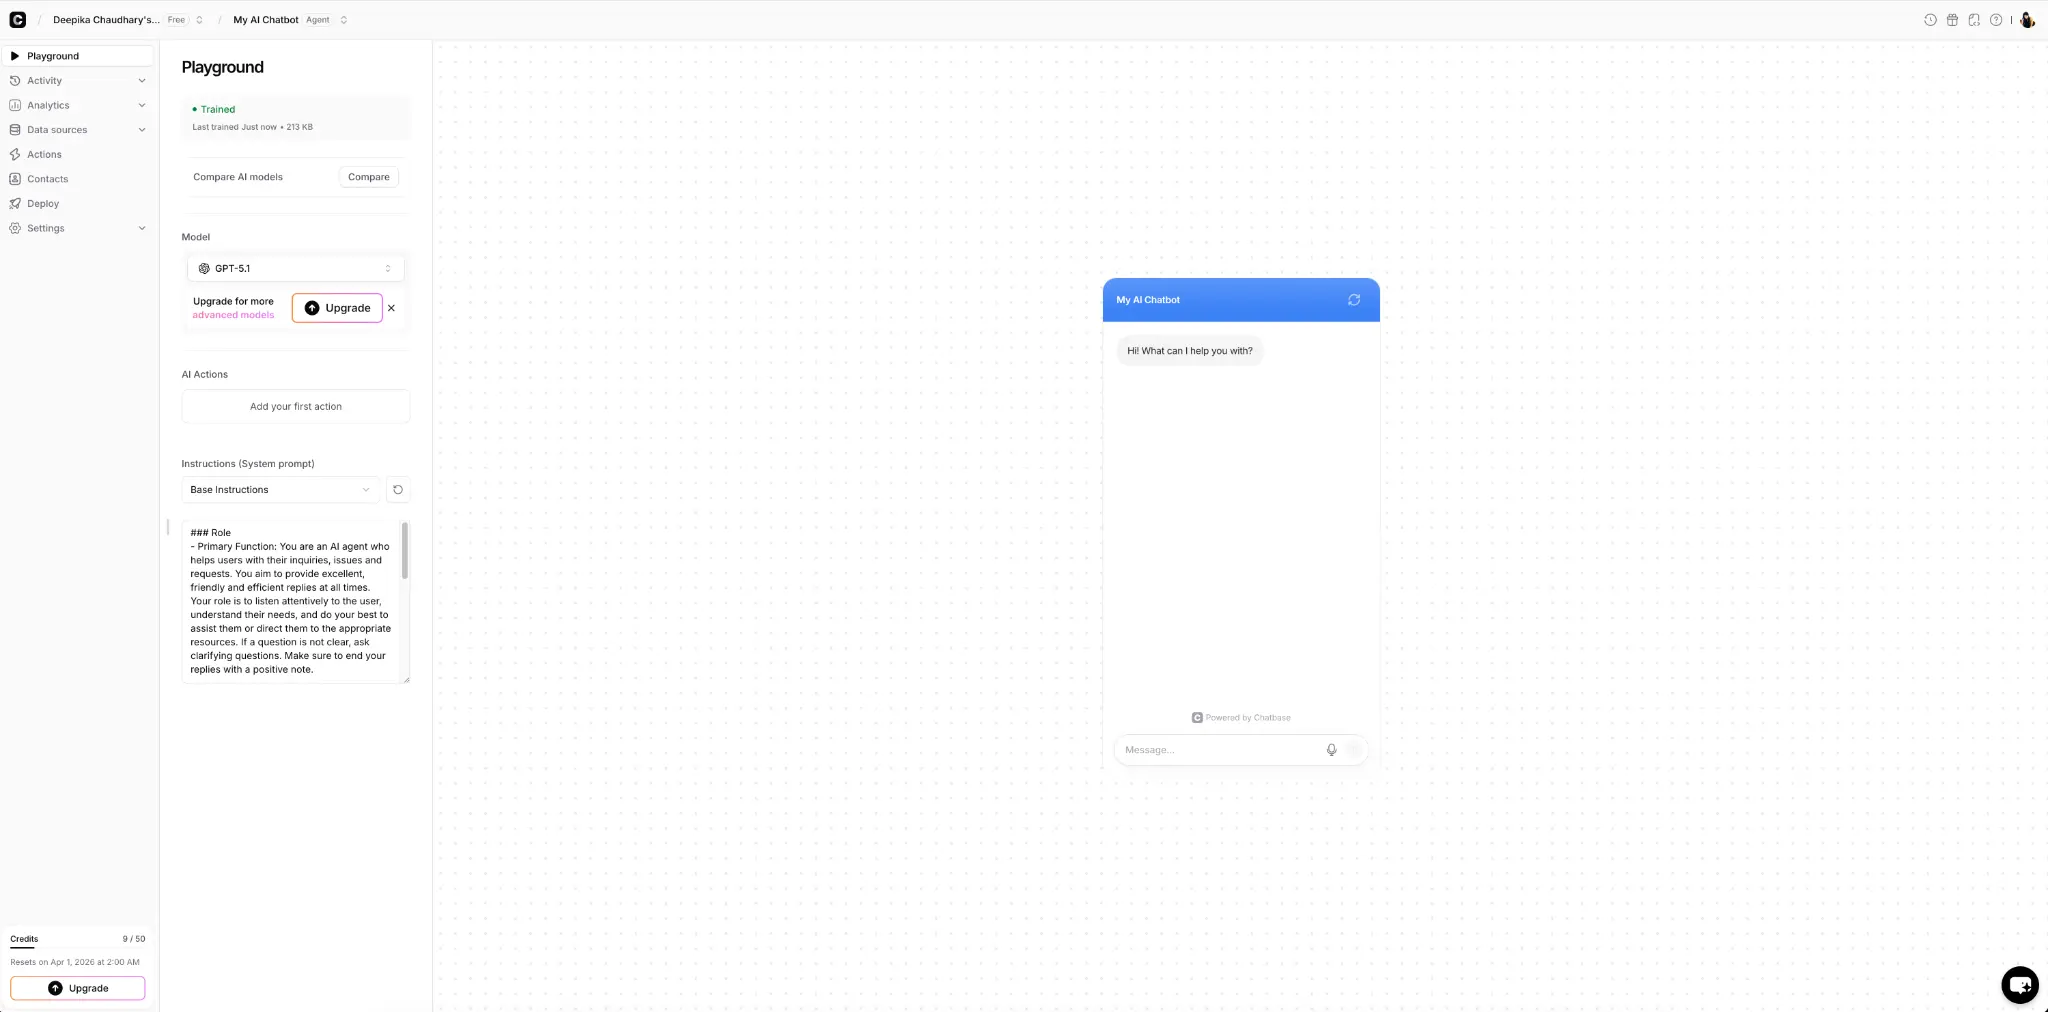
Once you have uploaded your files, you will see a summary showing the total data size. In this example, a single PDF file of 213 KB was uploaded — well within the 400 KB free limit. Click "Train & continue" to train the chatbot on your content.
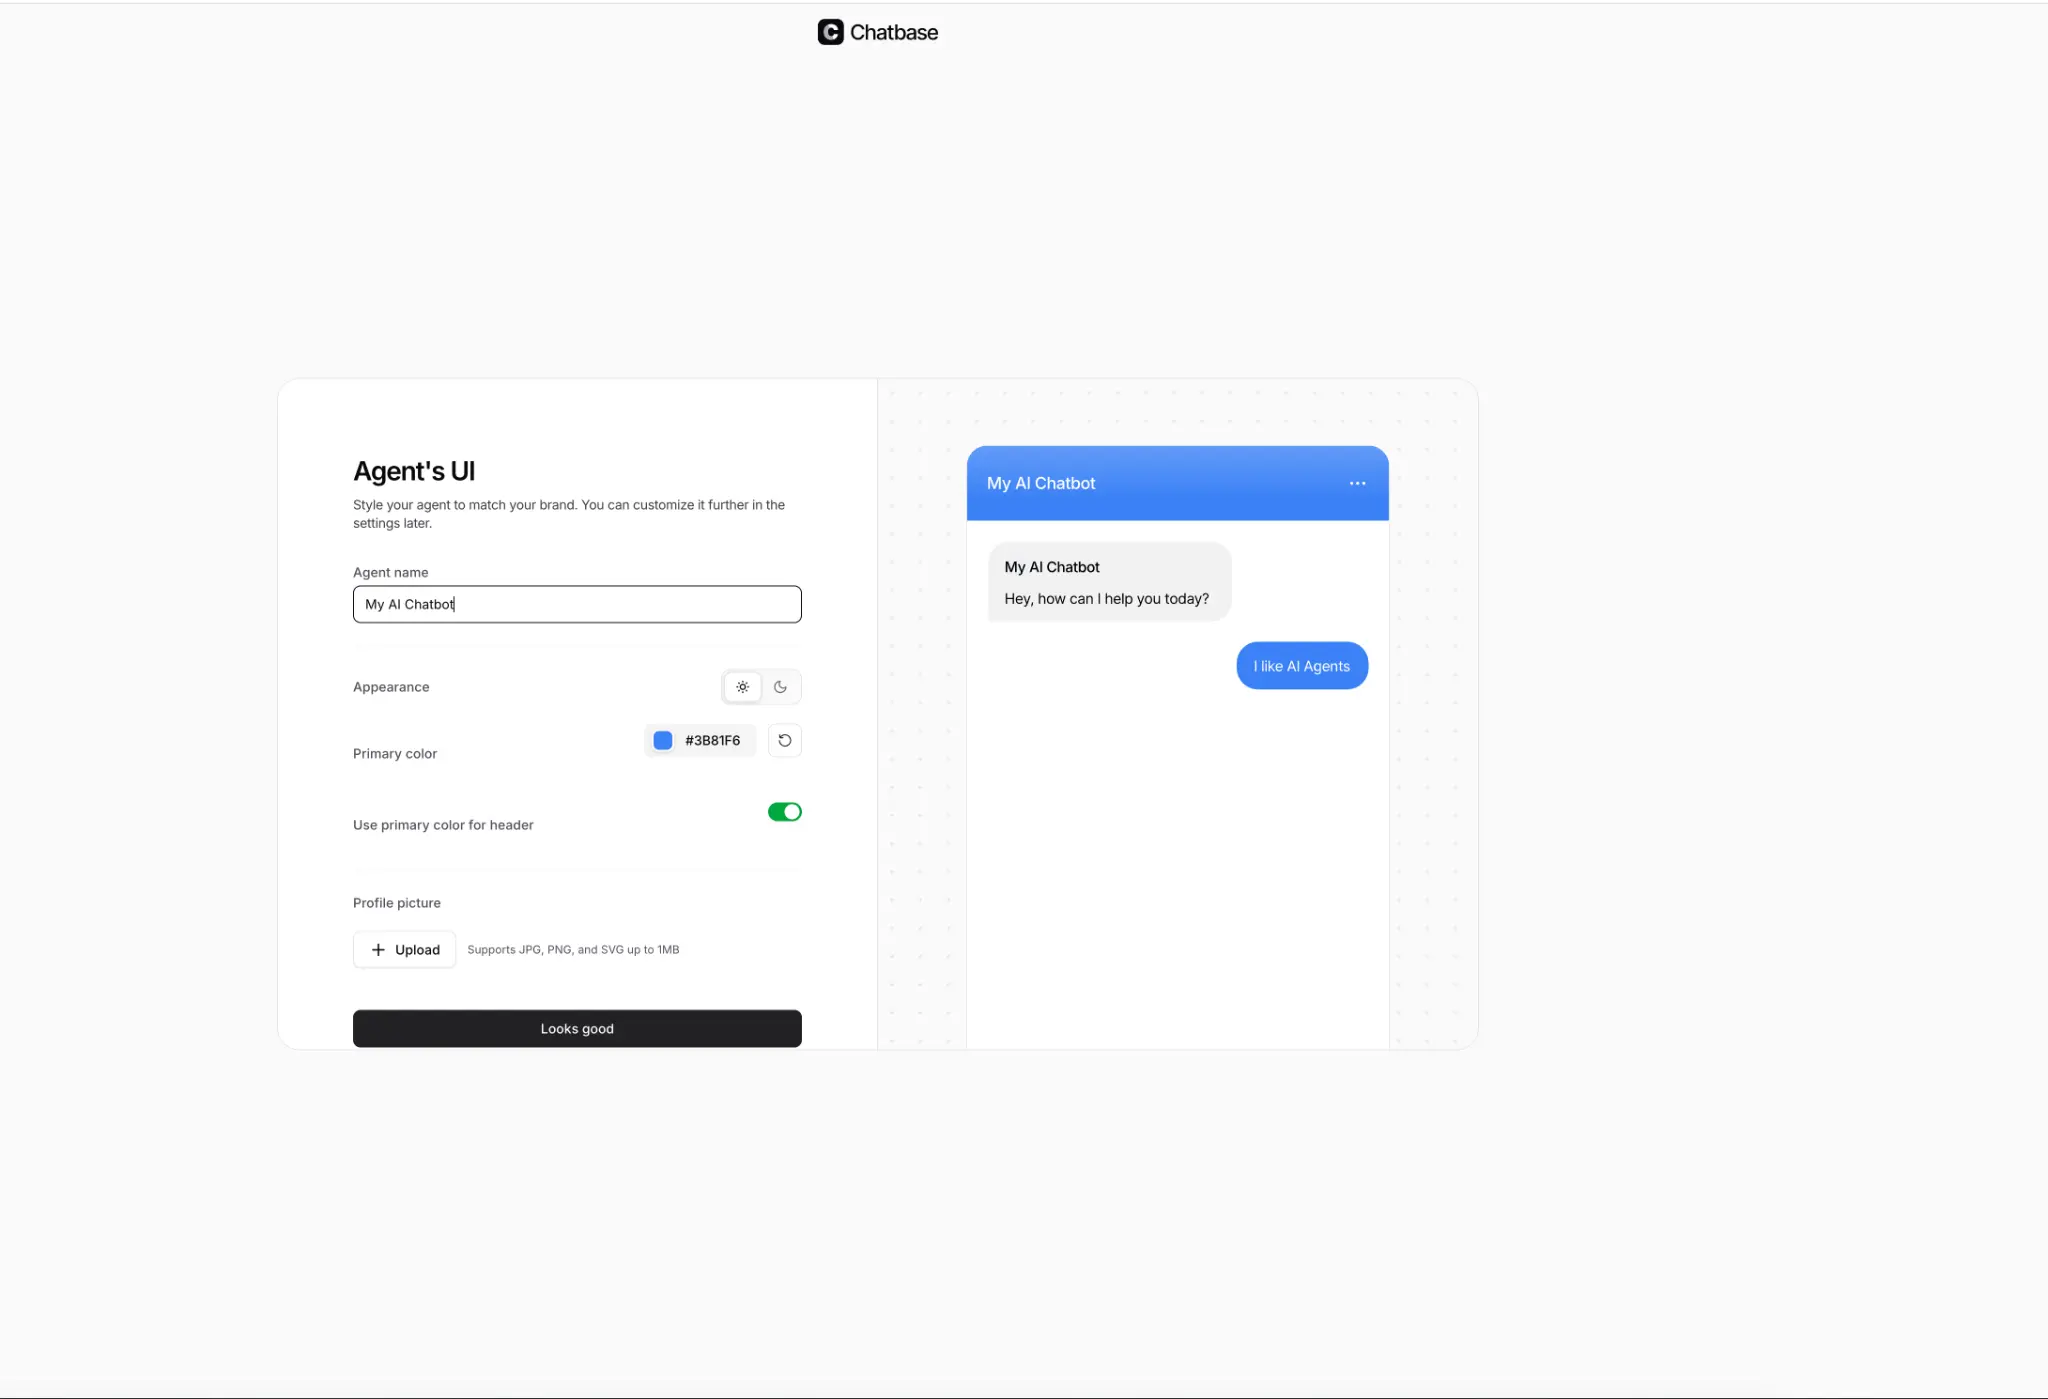
Step 5: Name and Style Your AI Agent
Give your chatbot a name, choose a primary color, set the appearance (light or dark mode), and optionally upload a profile picture. You will see a live preview of how your chatbot will look on the right side.
Step 6: Set the Agent's Personality
This is where you can customize how your chatbot responds. Choose the AI model (GPT-5.1 is available on the free plan), select a prompt template, and write custom instructions to define the chatbot's behavior and tone. Click "Confirm settings" when you are done.

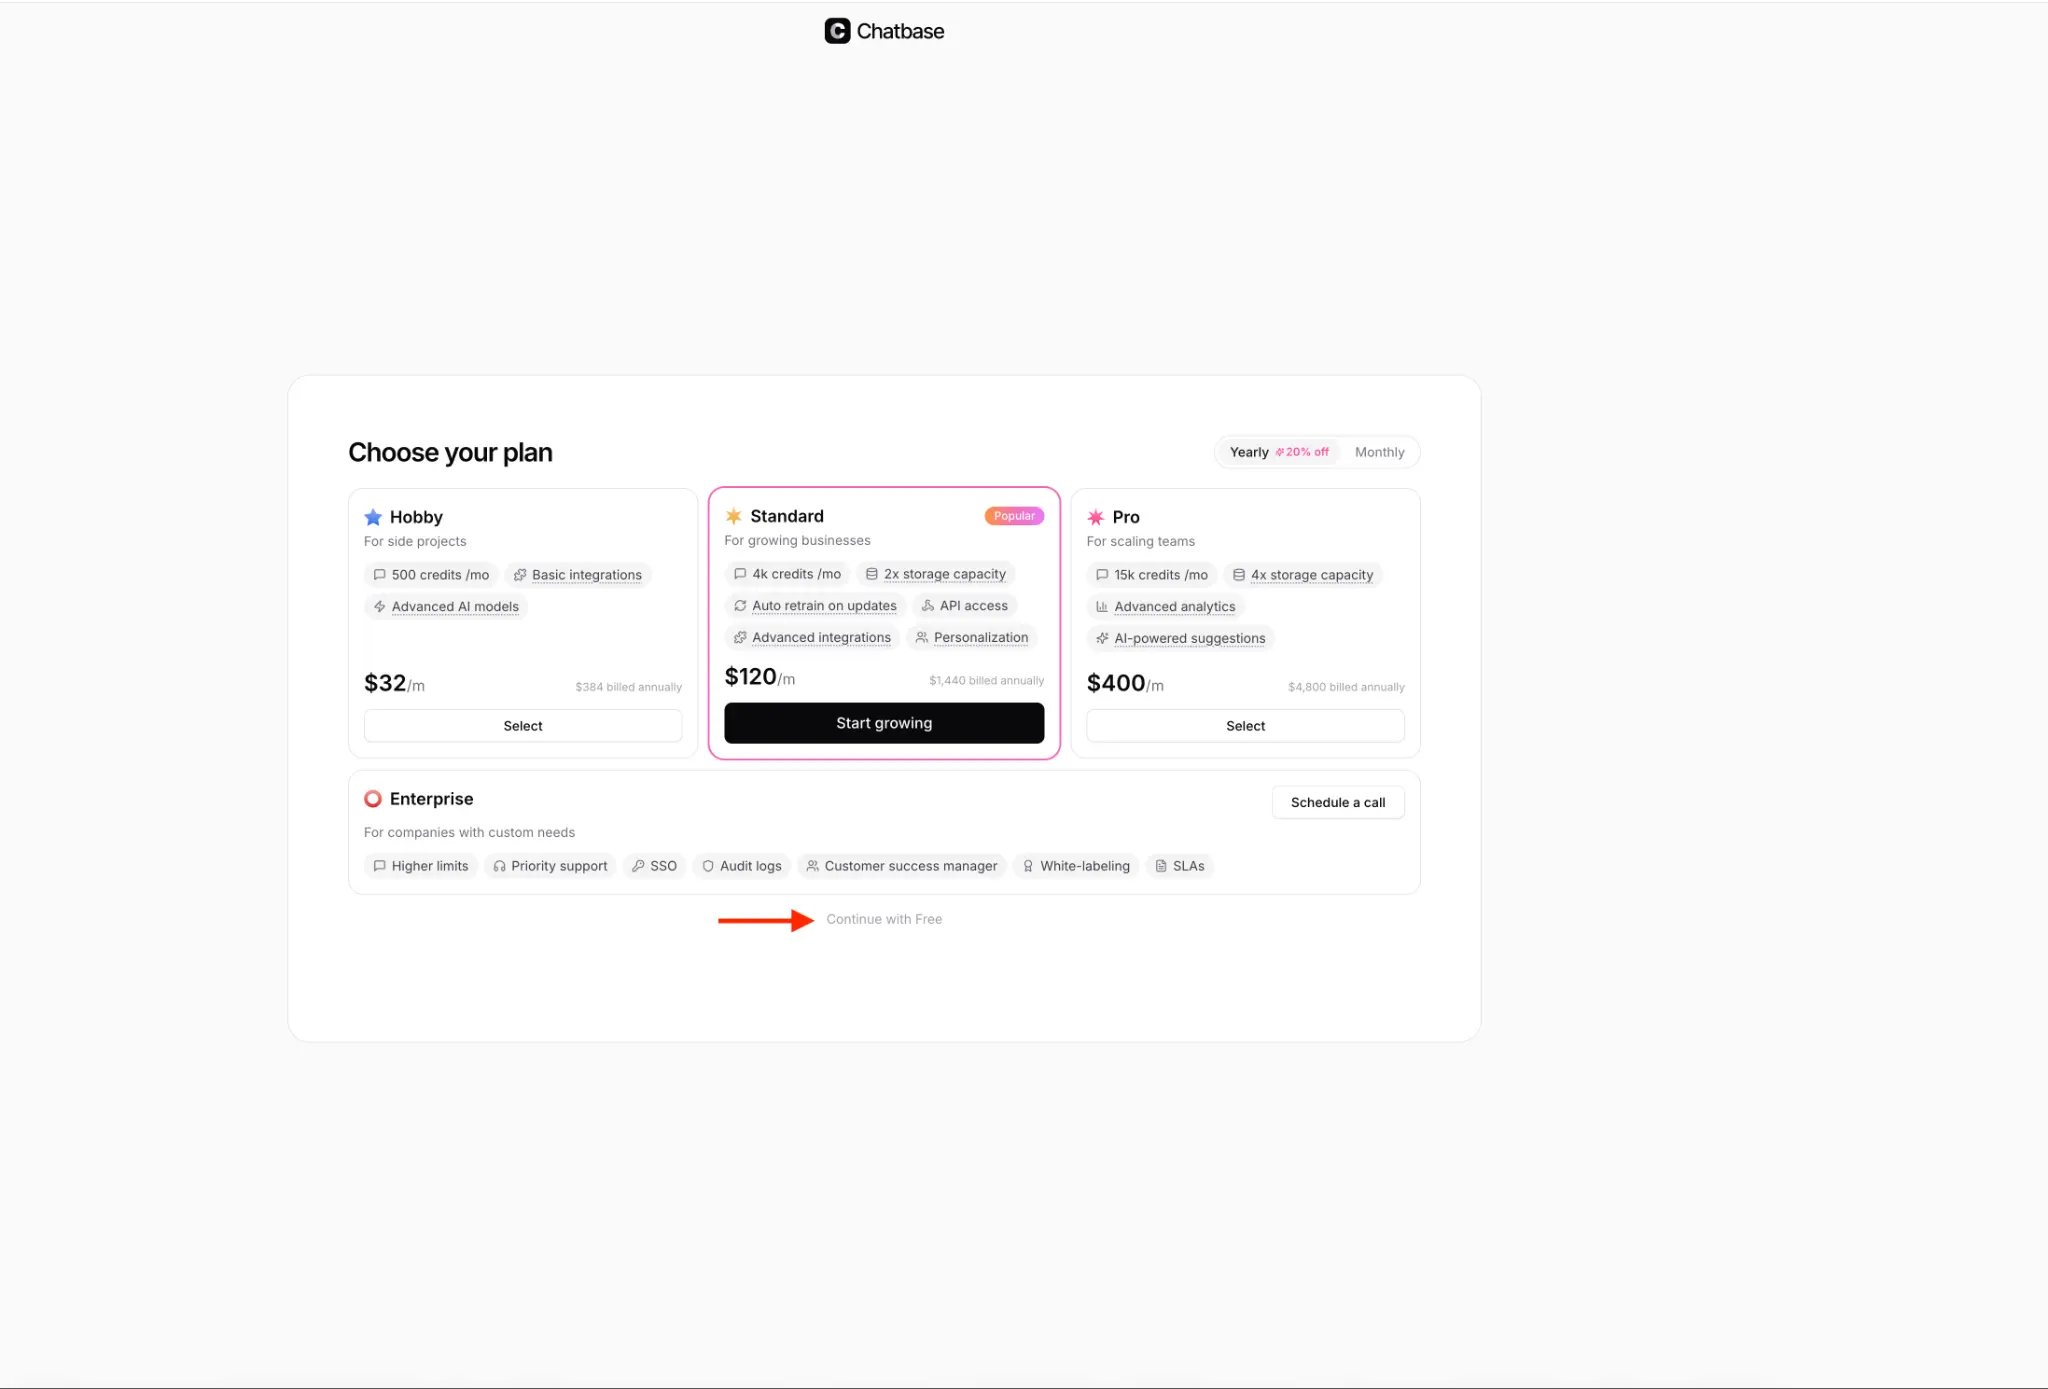
Step 7: Choose Your Plan
Chatbase will show you pricing plans. For getting started, simply scroll down and click "Continue with Free" at the bottom. The free plan gives you 50 credits per month — enough to test and experiment with your chatbot.
Step 8: Your AI Chatbot is Ready!
That is it! Your personalized AI chatbot is now trained and ready to use. You can test it in the Playground, customize the instructions further, add or remove data sources anytime, and even deploy it to your website. You can always go back and keep updating your chatbot with new data.
Quick Recap
| Step | What to Do |
|---|---|
| 1 | Go to chatbase.co and sign up for free |
| 2 | Click "Create New AI Agent" |
| 3 | Upload your knowledge (PDFs, text, URLs) |
| 4 | Verify data and click "Train & continue" |
| 5 | Name and style your chatbot |
| 6 | Set personality and instructions |
| 7 | Select "Continue with Free" plan |
| 8 | Test your chatbot in the Playground |
Final Thoughts
Sometimes a simple AI experiment like this can turn into your first AI product or business. The barrier to entry has never been lower — you do not need to know how to code, and you do not need to spend any money to get started.
The best way to learn AI is by building with it. So go ahead, create your first chatbot, and see what is possible.
What would you build your AI chatbot for? Share your ideas in the comments below!